Showing posts with label dessert. Show all posts

Perhaps the BEST Chocolate Chip Cookies EVER


I love cooking. I also love looking through cookbooks for new recipes and now with the internet and recipe blogs, I am able to look at A LOT of recipes. I love it! I also love chocolate chip cookies. I have mastered my own recipe and quite enjoy it. One day I came across this recipe which claimed to be the best chocolate chip cookie ever. I didn't believe it, but had to try it for myself. They may in fact be my new favorite chocolate chip cookies. I guess the recipe came from the New York Times and I would recommend following it exactly....the chilling time is necessary! Enjoy!


2 cups minus 2 tablespoons cake flour*
1 2/3 cups bread flour
1 1/4 teaspoons baking soda
1 1/2 teaspoons baking powder
1 1/2 teaspoons coarse salt
2 1/2 sticks (1 1/4 cups) unsalted butter
1 1/4 cups light brown sugar
1 cup plus 2 tablespoons granulated sugar
2 large eggs
2 teaspoons pure vanilla extract
3 cups semi-sweet or bittersweet chocolate chips

Directions
1. Sift flours, baking soda, baking powder and salt into a bowl. Set aside.
2. Using a mixer fitted with paddle attachment, cream butter and sugars together until very light, about 5 minutes. Add eggs, one at a time, mixing well after each addition. Stir in the vanilla. Reduce speed to low, add dry ingredients and mix until just combined, 5 to 10 seconds. Drop chocolate chips in and stir just til combined. Press plastic wrap against dough and refrigerate for 24 to 36 hours. Dough may be used in batches, and can be refrigerated for up to 72 hours.
3. When ready to bake, preheat oven to 350 degrees. Line a baking sheet with parchment paper or a nonstick baking mat. Set aside.
4. Scoop heaping tablespoon scoops onto baking sheet. Bake until golden brown but still soft, about 12 minutes. Transfer sheet to a wire rack for 10 minutes, then slip cookies onto another rack to cool a bit more. Repeat with remaining dough, or reserve dough, refrigerated, for baking remaining batches the next day.


*If you do not have any cake flour, simply measure 1 cup of all purpose flour, remove 2 TBS. and replace with 2 TBS. cornstarch

Churros


What? I didn't even know it was possible to make churros yourself. I like to do themed dinners and so Cinco de Mayo was a perfect excuse, the only problem.....I got sick! I was bummed that I couldn't celebrate that day with food, but we went ahead and did a late version. I made some delicious taquitos (recipe coming later) and we ended the meal with churros. This is the recipe I used and it actually worked, of course I altered it a little bit. We were all in AWE at how light, fluffy and delicious they are!!! (unfortunately there is not a good way to photograph churros, but we tried)!


1 cup water
1/4 cup butter

1/4 teaspoon salt

1 cup flour

2 large eggs

1 tsp. vanilla
vegetable oil for frying

1/4 cup sugar
1 teaspoon ground cinnamon


Combine water, butter, and salt in a medium saucepan.

Bring to a boil. Remove from heat; stir in flour. Beat with a wooden spoon until dough forms a ball and begins to leave the sides of the pan.

On high speed of an electric mixer, beat in eggs, one at time, beating after each addition, until mixture is smooth. Add vanilla.

In a deep frying pan or electric skillet, heat 3/4" of vegetable oil to 375. Spoon dough into a pastry bag fitted with a large star tip. Pipe 3 inch strips into hot oil (we used scissors to snip the dough into the oil).

Fry churros, a few at a time, for about 3 to 4 minutes or until a deep golden brown, turning once. Remove from oil using a slotted to; drain on paper towels.

Combine 4 tablespoons sugar with 1 teaspoon ground cinnamon in a clean brown paper bag. Toss churros in the cinnamon mixture to coat well.

Serve immediately or store in in a tight container for up to one day.

Makes approximately 3 dozen churros.

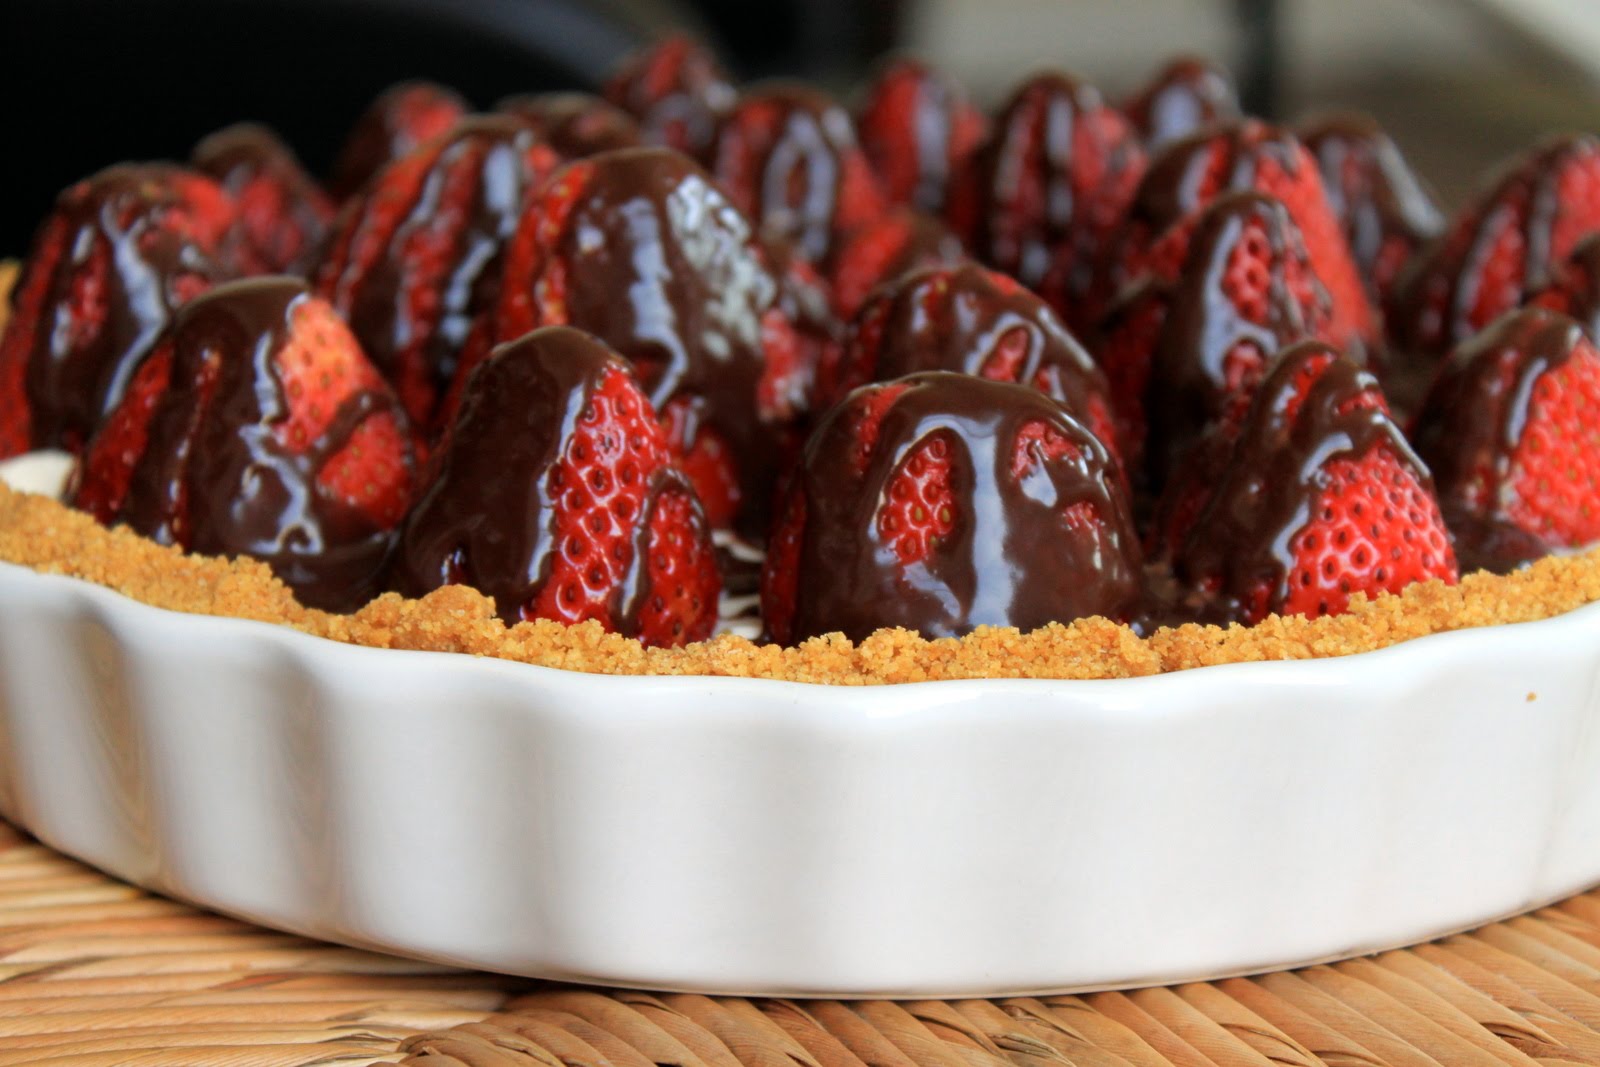
Strawberries and Cream Pie with Chocolate Drizzle

It's Easter which means the pressure is on to make a fabulous dessert. I just wasn't feeling it this year and wasn't sure what to do. Friday afternoon I stumbled across this recipe on one of my favorite cooking blogs "Our Best Bites." I thought it looked intriguing, but it wasn't until late Saturday night I decided to whip it up for Easter Sunday (good thing I had all the ingredients on hand). SO easy! And there is nothing I love more than chocolate and strawberries together . . . adding a cream cheese mixture and graham crackers just makes it all that much better! I changed the recipe a bit from the original to make it my own - I needed more chocolate!


1 quart fresh strawberries
1 8-oz. package cream cheese at room temperature (I used light)
1/2 tsp. vanilla extract
1/4 c. packed light brown sugar
1 c. heavy whipping cream
1/4 c. powdered sugar
1 9″ graham cracker crust (store-bought or homemade)
1/4 c. whipping cream
1/4 c. semi-sweet chocolate (chips work great)

In a medium bowl, beat the softened cream cheese, brown sugar, and vanilla until light and fluffy. In a separate large bowl, beat the whipping cream and powdered sugar until medium peaks form. Add about 1 c. of the whipping cream mixture to the cream cheese mixture. Beat until smooth and well-combined. Add the remaining whipping cream mixture and mix until just combined. Spread in the graham cracker crust and refrigerate for a few minutes while you prepare the strawberries.

Wash the strawberries and cut off the stems. Blot dry with a paper towel and then gently press, cut side down, into the whipped cream mixture. Set aside.

Pour 1/4 c. whipping cream in microwave safe dish. Heat about 1 minute until cream starts to bubble (or heat on stove). Remove and pour over chocolate. Stir until melted and smooth. Let sit for a few minutes to cool (ganache thickens as it cools, so you can decide what consistency you like best). When ganache is ready and cool drizzle it over the strawberries. Refrigerate for at least three hours before serving. Serves 8.

No Bake Chocolate Silken Pie


My mother-in-law shared this recipe with me. When I read the ingredients, I wasn't so sure it was for me . . . BUT I have been attempting to introduce more healthful foods into my diet, tofu being one of them. I decided to give it a try. First, let me say how SIMPLE it was to make. Secondly, it was so RICH that I could barely eat an entire piece. It was so yummy and I felt okay about eating it because it wasn't full of fat and too much sugar. I would highly recommend it.
I wasn't able to find Silken tofu at every grocery store. I don't know what the difference is but once I found it, I did use it. Enjoy!

1 graham cracker crust (either pre-made, or make your own)
My recipe:
1 1/2 cups crushed graham crackers
2 TBS sugar
1/3 cup butter, melted
In a medium bowl, melt butter. Stir in sugar and graham cracker crumbs. Press onto the bottom and up the sides of an ungreased 9-in. pie plate. Refrigerate for 30 minutes before filling, or bake at 375 degrees F for 8-10 minutes or until crust is lightly browned. Cool on a wire rack before filling.

Filling:
16 oz. Silken tofu
12 oz. semisweet chocolate chips
1 tsp. vanilla (or almond)
Whipped cream to garnish

Melt chocolate in microwave or in a double boiler.
Place tofu in a blender and blend until smooth. Add chocolate and extract. Pulse until mixed. Pour into graham cracker crust and chill at least 1 hour.
Serve with whipped cream.

Kneaders Double Chocolate Peppermint Brownies


I have this friend. We met in high school when we worked at the video store together. She is AWESOME! We always had the best time together. Then we grew up. We went to college. One of us got married (that's me). One of us traveled the world (that's her). Through it all, we kept in contact. She is currently living on the other side of the country. She recently got married and is now expecting baby #1!! I'm so excited for her. Anyway, when I was expecting baby #3 and we found out about my mom's cancer, she happened to be in town. Since she is so awesome, she came for a visit and brought some of these beauties with her. I LOVE, LOVE, LOVE peppermint brownies and these may be the best I've had!! Did I mention she is the best? I realize it is no longer Christmas time, but believe me you can eat these anytime and you won't be disappointed. Enjoy!

Brownie
1 cup butter
4 oz unsweetened chocolate
2 cups sugar
1 teaspoons vanilla
4 eggs
1 cup all-purpose flour
2 cups semisweet chocolate chips

Melt the chocolate and butter in a 2 quart bowl in the microwave on high for 3 minutes, stirring every 20 – 30 seconds until the chocolate is melted. Cool slightly.
Add sugar, eggs and vanilla and mix well with a spatula.
Add the flour and stir to combine.
Stir in chocolate chips. Spread into a buttered 13-inch x 9-inch x 2-inch baking pan.
Bake at 350 for 25 minutes. Do not overcook. Cool.

Filling
½ cup softened butter, margarine, or shortening
2 cups confectioners’ sugar
2 drops mint flavoring or to taste
1 drop pink food coloring
(I had to add evaporated milk to this as well)

In a small bowl, beat the confectioners’ sugar, butter and mint flavoring until smooth.
Add food coloring to make a light pink.
Spread evenly over cooled brownies and then chill.

Chocolate Ganache
½ cup semisweet chocolate chips
¼ cup heavy cream crushed peppermint ( red and white)

Put the chocolate chips and cream into a small bowl.
Microwave on high for 1 minute stirring every 20 – 30 seconds until chocolate is melted. Do not over heat. Immediately pour over the brownies.
Decorate with crushed peppermint.

Do not refrigerate. Mixture will set up on brownies in about 15 – 20 minutes.

The chef's notes: Instead of doing the ganache, I just substituted chocolate frosting which I just made with powdered sugar, evaporated milk, softened margarine and some cocoa powder. Once I put on the mint frosting I put them in the fridge to let the frosting harden and then added the chocolate frosting. I think the brownies ended up cooking about 30 minutes instead of 25 - but your oven might be different. Enjoy!

Vanilla Cupcakes with Strawberry Filling


Somebody around here had a birthday last week. Audra turned 1 on Friday. Amazing how quickly a year has gone by! I have been looking forward to making a girl birthday cake, since I made Conner his first birthday cake. Many months ago I came across some small cake pans, I ordered them knowing I would be using them to make her a cake at some point. It was very difficult to frost, but turned out cute and she was our most destructive 1-year-old eater.


But the rest of us needed a treat, so I combined a bunch of recipes and came up with these delicious cupcakes. I definitely think I will use more filling next time, but they were a hit. Oh, and I could have been much generous with the frosting - I was worried about running out. Turns out I had quite a bit left over! I kind of feel like I've been on an episode of "Cupcake Wars" (on the Food Network), so I think I'm done with cupcakes for awhile. Enjoy!


Vanilla Buttermilk Cupcakes

1 1/3 cups all purpose flour
½ teaspoon baking soda
½ teaspoon baking powder
¼ teaspoon salt
1 cup sugar
¼ cup butter, room temperature
1 large egg
1 teaspoon vanilla
¼ tsp almond extract
1 cup buttermilk

Preheat oven to 350F. Place liners in a 12 cup muffin tin.

In a medium bowl, stir together flour, baking soda, baking powder and salt.

In a large bowl, using an electric mixer, beat the butter and sugar together until it looks creamy.

Beat in the egg and the vanilla and almond extracts until mixture is smooth. Add half of the flour mixture to the butter mixture and stir until almost combined. Add buttermilk and stir, again, until almost combined. Add the rest of the flour and stir until all ingredients are mixed in.
Divide batter evenly into muffin cups.

Bake for 18-20 minutes at 350F, until a toothpick inserted into the center of a cupcake comes out clean. Cool before filling.

Strawberry Filling
1 (8-ounce) container mascarpone cheese, chilled (I used cream cheese)
1/2 cup thawed and drained frozen strawberries (I used fresh strawberries)
1/4 cup sugar, plus 1/2 cup
1 tablespoon lemon juice

In a food processor combine the mascarpone cheese, strawberries, 1/4 cup sugar, and lemon juice. Process the mixture until smooth. Transfer the mixture to a pastry bag fitted with a small tip. Push the tip gently into the bottom of a cupcake and squeeze in the strawberry mixture until the cupcake plumps. Continue with the remaining cupcakes.

The Best Frosting
3 cups powdered sugar
1 cup butter (soft)
1 teaspoon vanilla
3 Tablespoons of whipping cream

Cream butter and powdered sugar together. Then add vanilla and whipping cream!

Cream-filled Cupcakes


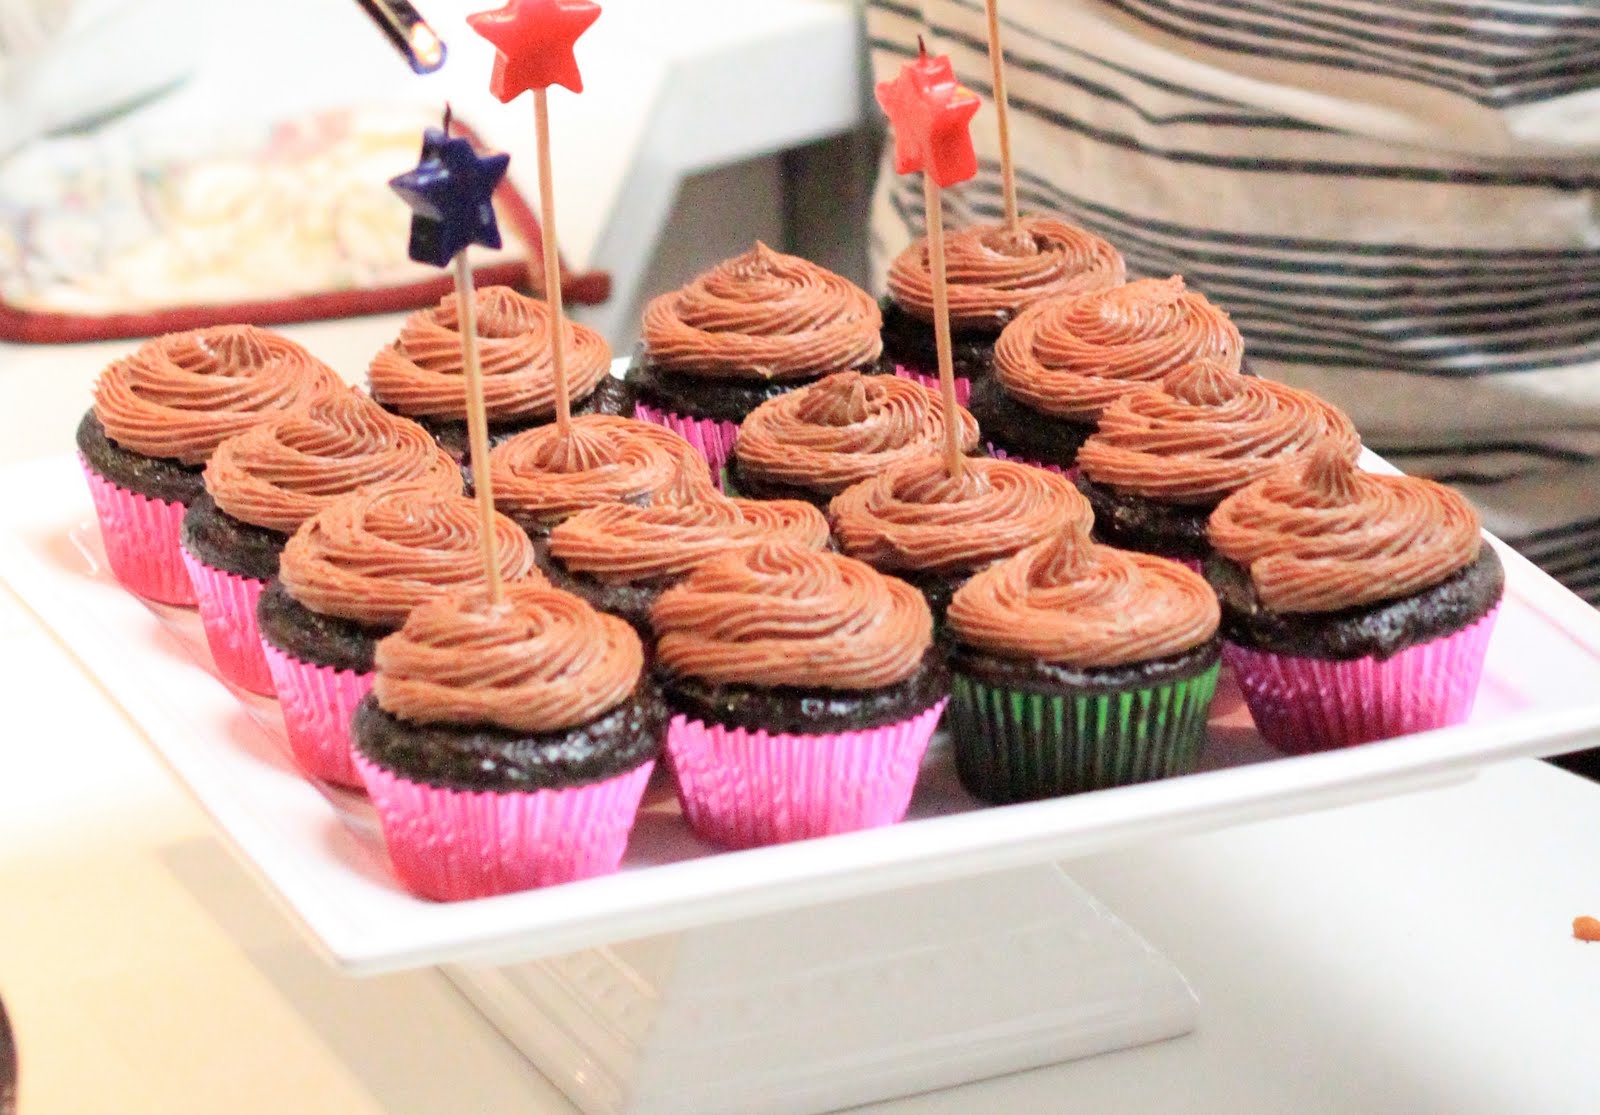
It was my brother-in-law's birthday. I am the assigned Sunday dinner dessert maker, so he requested chocolate cupcakes with chocolate frosting. Well, I couldn't just stop there. I mean I love chocolate and all, but I watch "Cupcake Wars" (on the Food Network) and needed to make these cupcakes a little more special. I decided a filling would be the best choice. I found a recipe I thought sounded delightful and turns out it was! Here's how it went down.

I made this recipe, but turned it into about 20-24 cupcakes. Filling paper cup liners 2/3 full. Baking them for 18-22 minutes.

Once they were cool, I used my handy-dandy apple corer to remove some cupcake from the center, taking care to not go all the way down. If you don't have said corer, just use a small spoon to remove. Or, you can just make the filling, put it in a piping bag and pipe directly in the center of the cupcake. No piping bag? No problem, just spoon some filling in the center and it doesn't have to look pretty because you'll be covering it up with frosting.

After filling the cupcakes, frost with your favorite chocolate frosting. One of my favorites is listed below. I kept these guys refrigerated. And they were devoured in no time!


Filling:
2 tsp very hot water
1/4 tsp salt
1 (7 oz) jar marshmallow cream
1/2 cup shortening
1/3 cup powdered sugar
1/2 tsp vanilla
Dissolve the salt in the hot water and allow to cool.
Whip the marshmallow cream, shortening, powdered sugar, and vanilla until it begins to get fluffy. Add the water and whip well.

For the frosting:
1 stick butter, at room temperature
1 – 8 ounce block cream cheese, at room temperature
2 teaspoons vanilla
3 cups powdered sugar
1/2 cup Dutch-processed cocoa powder

Beat cream cheese and butter until creamy. Slowly add in cocoa powder and powdered sugar. Add vanilla. Spread and enjoy!

Peanut Butter Balls

This recipe (and picture because I forgot) comes from my Parents magazine. In the past I have made Peanut Butter Cups several times, but never just balls. I like the balls because it is less chocolate, although a bit trickier to dip. I also like the added element of sprinkles, it made it more festive. I made these to give to my Visiting Teaching ladies for a little Valentine's Day treat.


1 c. creamy peanut butter
1 1/2 c. powdered sugar
5 TBS. unsalted butter, at room temperature
1/2 tsp. vanilla
1 1/2 c. chocolate candy melts, or chocolate chips

Mix all ingredients together; knead until smooth, adding up to 1/2 c. more powdered sugar as needed to prevent sticking. Roll dough into 1" balls and set on wax paper-lined baking sheet. Chill 1 hour. Line 2 more baking sheets with wax paper and set aside.

Microwave candy melts (or chips), stirring every 30 seconds until smooth. Drop the balls in a few at a time to coat. Remove balls with fork allowing excess chocolate to drip off. Roll balls in sprinkles to coat. Place on lined baking sheets; chill until chocolate is set.

Carrot Cake


Nothing fancy about this recipe. Just the carrot cake recipe I always make. Really, how can you mess up carrot cake - it is moist, simple to make, and covered in that luscious topping called cream cheese frosting. I made this miniature cake for my hubby for his birthday. You see, our birthdays are just 4 days apart so when we gather as an extended family on Sunday to celebrate we get to pick what we want to eat and what kind of cake. I usually don't have an opinion because as long as I don't have to cook it, I don't care what it is :-), so I let him pick. He suggested carrot cake. I shot it down (I know I said I don't usually have an opinion). If there's one thing in this world I couldn't live without it is chocolate. I didn't want a birthday cake made out of vegetables :-). I felt bad, so on the night before his birthday I made him a mini-carrot cake. It was delish, but certainly not chocolate so at least we both got what we wanted!


2 cups all-purpose flour
2
cups sugar
1
teaspoon baking powder
1
teaspoon baking soda
1
teaspoon ground cinnamon
3
cups finely shredded carrots
1
cup cooking oil
4
eggs

Grease and lightly flour two 9x1-1/2-inch round baking pans or grease one 13x9x2-inch baking pan; set pan(s) aside.

In a large mixing bowl combine flour, sugar, baking powder, baking soda, and cinnamon. Add carrots, oil, and eggs. Beat with an electric mixer till combined. Pour batter into the prepared pan(s).

Bake in a 350 degree F oven for 30 to 35 minutes for round pans or 35 to 40 minutes for 13x9-inch pan or until a wooden toothpick comes out clean. Cool layer cakes on wire racks for 10 minutes. Remove from pans. Cool thoroughly on wire racks. Or, place 13x9-inch cake in pan on a wire rack; cool thoroughly. Frost with Cream Cheese Frosting. Cover and store in refrigerator. Makes 12 to 16 servings.

Cream Cheese Frosting:

2 3-ounce packages cream cheese, softened
1/2 cup butter or margarine, softened
2 teaspoons vanilla
4-1/2 to 4-3/4 cups sifted powdered sugar

Beat together cream cheese, butter, and vanilla until light and fluffy. Gradually add 2 cups of the powdered sugar, beating well. Gradually beat in enough of the remaining powdered sugar to reach spreading consistency.

Cake Pops

Yip, it's me! I'm still here, can you believe it? It would seem that becoming a mother of three has thrown my life in the air. It has been an adjustment for sure. Lots of things have had to give, including this blog & cooking for that matter. My time is not my own anymore. I have always LOVED to cook, but just don't have the time that I use to. I know this is just a phase and that soon I will be able to get back to trying new recipes, introducing my family to a more advanced variety of foods, and baking, baking, baking (my favorite). It's not that I haven't been cooking. I have. It's just that when I do cook, it is usually thrown together quickly and I am just happy to get it on the table and be done with that part of the day. I don't even think about taking a picture and then documenting what has been created. I will try to do more in future, because I have been told (in my absence) that there are a lot of you out there who want me to update......
For now I bring you this little ditty. I wanted to thank some gals in my life and had been wanting to try this recipe, so I put two and two together and whipped some up for them. I learned a lot along the way (see my notes), one of which was that I am not nearly as talented as many folks out there. This is not a new recipe - just search 'cake pops' and you'll see what I mean. And mine are not nearly as cute as some out there, but I think they fit the bill. I would encourage you to try them out....the varieties/possibilities are endless. This recipe is kind of up to you, but here is a basic idea with some of my notes included.


1 Package of any boxed cake mix, baked as directed on the box (I whipped up a yellow cake from scratch *see recipe)
1 (16oz) can of frosting (I made some cream cheese frosting **see recipe)
1 Package of Wilton’s candy melts. White or dark chocolates (I used melted milk & semi-sweet chocolate)
(I think making a chocolate cake, using cream cheese frosting and then dipping in pink candy melts would be darling and delicious as well)

Bake cake and allow to cool completely (about one hour).
Crumble cake in large bowl and add frosting. (Enough frosting that the mixture holds together, but is not too sticky)

Put cake mixture in fridge and chill for 30 min

Shape dough into balls or press into favorite cookie cutter.

Dip end of stick in candy melts and insert into cake ball. Allow to harden. This helps cake to stay on the stick. (I did not do this and wish I would have; another option is to put the sticks in the balls and then freeze for about 30 minutes)

When ready, dip cake pop in candy melts and dry by sticking in a piece of Styrofoam. At this point you can add decorations.

Have fun and enjoy!

*Yellow Cake
2 1/2 c. flour
2 1/2 tsp. baking powder
1/2 tsp. salt
2/3 c. butter
1 3/4 c. sugar
1 1/2 tsp. vanilla
2 eggs
1 1/4 c. milk

Preheat oven to 375; grease a 9X13 pan and set aside. In bowl of an electric mixer, beat butter on medium speed for 30 seconds. Add sugar and vanilla; beat till well combined. Add eggs, one at a time, beating 1 minute after each one. Add dry ingredients alternately with milk, beating on low speed after each addition just till combined. Pour batter in prepared pan. Bake 25-30 minutes till toothpick comes out clean.

** Cream Cheese Frosting
6 oz. cream cheese, softened
1/2 c. butter, softened
2 tsp. vanilla
4 1/2 c. powdered sugar

Beat cream cheese, butter and vanilla together until creamy. Gradually add 2 c. powdered sugar, beating well. Gradually beat in the remaining powdered sugar. (May not need to use all this frosting in the cake crumbs)

Flourless Chocolate Cake


For those who don't know, my 2 year old is gluten-intolerant, as is my mom. And since I would prefer that the little girl (currently 5 months) does not end up with the same condition, I myself am not eating gluten while nursing her. That means finding lots of recipes that don't contain gluten (wheat, barley, rye, etc.), which means no wheat flour. I have a neighbor who has celiac disease and she has shared some of her secrets with me, including a great flour substitute. Unfortunately, a lot of gluten free foods have a grainy texture due to the rice flour. I thought there must be some sort of flourless desserts out there, so I headed to Google. I found A LOT of recipes. . . . this is one that I found and then altered to make it my own. It was amazing! Really fudgy and extremely rich. I served it with sweetened whipped cream, and macerated strawberries. It would also be good a la mode. Enjoy!

4 ounces fine-quality bittersweet chocolate (not unsweetened)
1/2 cup milk chocolate chocolate chips
1 stick (1/2 cup) unsalted butter
3/4 cup sugar
5 large eggs, separated
3/4 unsweetened cocoa powder

Preheat oven to 375°F and butter an 9-inch round baking pan. Line bottom with a round of wax paper and butter paper.

Chop chocolate into small pieces. In a double boiler or metal bowl set over a saucepan of barely simmering water melt chocolate with butter, stirring, until smooth. Remove top of double boiler or bowl from heat and whisk sugar into chocolate mixture. Add eggs yolks and whisk well. Sift cocoa powder over chocolate mixture and whisk until just combined. In a separate bowl, beat egg whites until soft peaks form; fold these into chocolate mixture. Pour batter into pan and bake in middle of oven 25 minutes, or until top has formed a thin crust. Cool cake in pan on a rack 5 minutes and invert onto a serving plate.

Dust cake with powdered sugar and serve!

Brownie Mousse Trifle


This is a recipe I concocted years ago because it incorporated some of my favorite treats: brownies, mousse, toffee - I mean you can't go wrong. It is a family favorite. I remember my Grandpa Bell used to request I make "that brownie" thing for our Sunday dinner dessert. I hadn't made it in awhile and decided it was time to divulge!


1 (9x13) pan brownies, prepared & cooled
1 recipe chocolate mousse, this is my fave
1 pint whipping cream
2-4 toffee bars, crushed

Prepare brownies as directed and let cool to room temperature; cut into 1" squares. Prepare mousse as directed. Whip cream using 1/4 c. powdered sugar and 1 tsp. vanilla (I use 3 TBS. agave nectar) until stiff peaks form.

In a trifle bowl put one layer of brownies (I kind of break them up just a bit as I drop them in the bowl), about a cup of mousse, and between a cup and a cup and half of cream, then sprinkle with some toffee chunks. Repeat 2 more times. Keep refrigerated until ready to serve and try to not go back for seconds.

Perfect Chocolate Dipped Strawberries

I am in love with berries.....I love this time of year when the strawberries are starting to come out and you can also find blueberries, raspberries, and blackberries. I also LOVE chocolate, so it would make sense that dipping berries in chocolate would just make my day! But, I feel like you need a reason to go to the effort of doing this. This last weekend, a reason presented itself --- my sister blessed her new little baby boy. We had a lunch with the families afterwards and I insisted on making these delicacies. Even I couldn't believe how well they turned out. The chocolate was soft and didn't crumble off, which I always find annoying. I actually dipped them the night before and at lunch time they were just starting to "sweat" or leak their juices, so this is definitely something you can't do too far in advance.


2 lbs. fresh strawberries
11 oz. package semi-sweet chocolate chips
6 oz. (1 cup) milk chocolate chips
3 TBS. shortening

Wash strawberries well and then set out to completely dry - may take several hours. Place a baking sheet lined with wax paper in the freezer for several hours before dipping.

In a double boiler melt chocolate chips; stir in shortening until completely melted. Dip strawberries 2/3 of the way up and carefully set on cold baking sheet. Decorate* as desired and enjoy within 24 hours!

* I decided to drizzle white chocolate over mine. I just melted about 1/4 c. white chocolate chips, and a teaspoon of shortening in a ziploc baggie in the microwave for about 30 seconds. Then I massaged the bag until they were all melted; I snipped the corner of the bag and went to town!

Chocolate Cream Cheese Cupcakes


A friend made these recently and they were so yummy I decided they would make the perfect treat for the ladies I visit teach....I'm not going to take the new baby out so treats and phone calls will have to do. I made mini cupcakes because let's face it, anything mini just tastes better and is more fun to eat. I even whipped up a gluten-free batch so my little guy could have some. They freeze really well, so you can always have some on hand. I think they are better frosted, but you can't go wrong just plain.


1 (8 ounce) package cream cheese, softened
1 egg, slightly beaten
1/3 cup sugar
1 pinch salt
1 (6 ounce) package chocolate chips
1 cup sugar
1 1/2 cups flour
1/4 cup cocoa
1 teaspoon baking soda
1/2 teaspoon salt
1 cup water
1/2 cup oil
1 tablespoon vinegar
1 teaspoon vanilla

In a small bowl, combine first four ingredients. Add chocolate chips and set aside. Mix remaining ingredients well. Fill muffin tins, lined with paper cups 1/3 to 1/2 full with this mixture. Drop a large spoonful of cheese mixture on top. Bake at 350 for 20 to 25 minutes.

*If making minis: fill cups about half full and drop about a teaspoon of cream cheese mixture on top. Bake 9-11 minutes, until toothpick comes out clean in the cake part.

Chocolate Frosting

1/4 cup butter, softened
3 TBS. cocoa powder
1 1/2 - 2 cups powdered sugar
1-2 TBS. milk
dash salt

Mix together well until nice spreading consistency.

German Chocolate Cake


German Chocolate Cake has always been one of my favorites. I would always request it on my birthday growing up. I haven't had/or made it for years, but my aunt requested it for her birthday cake and I was asked to make it. Now I know why I love it so much......butter. There is so much butter it is frightening, but there is no way around it. My suggestion is just to enjoy every delicious, moist bite!!


1/2 cup water
4 (1 ounce) squares German sweet chocolate
1 cup butter, softened
2 cups white sugar
4 eggs, room temperature
1 teaspoon vanilla extract
1 cup buttermilk, room temperature
2 1/2 cups sifted flour
1 teaspoon baking soda
1/2 teaspoon salt

Preheat oven to 350 degrees. Grease, flour and line 2 - 9 inch round pans with parchment paper or wax paper rounds. Sift the flour, add baking soda and salt to flour. Set aside. In a small saucepan, heat water and 4 ounces chocolate until melted. Remove from heat and allow to cool.
In a large bowl, cream 1 cup butter and 2 cups sugar until light and fluffy. Beat in 4 eggs, one at a time. Blend in the melted chocolate mixture and vanilla. Beat in the flour mixture, alternately with the buttermilk, mixing just until incorporated. Do not over mix.

Pour into 2- 9 inch pans. Bake in the preheated oven for 20-30 minutes, or until a toothpick inserted into the center of the cake comes out clean. Allow to cool for 10 minutes in the pan, then turn out onto wire rack. Wrap in Saran or other plastic wrap and place in freezer until frozen and ready to fill and frost cake.


Coconut Pecan Filling

4 egg yolks
1 can (12 oz.) evaporated milk
1-1/2 tsp. vanilla
1-1/2 cups sugar
3/4 cup (1-1/2 sticks) butter or margarine
1 pkg. (7 oz.) flake coconut, I used sweetened (about 2-2/3 cups)
1-1/2 cups chopped pecans

Beat egg yolks, milk and vanilla in large saucepan with wire whisk until well blended. Add sugar and butter; cook on medium heat 12-15 minutes or until thickened and golden brown, stirring constantly. Remove from heat.

Add coconut and pecans; mix well. Cool to room temperature before frosting cake.


Chocolate Frosting

1/4 cup (1/2 stick) butter, at room temperature
1/4 to 1/3 cup unsweetened cocoa powder
1 1/2 to 2 cups powdered sugar
1/4 teaspoon salt
2-3 tablespoons milk
1 teaspoon vanilla extract

Cream butter. Stir in cocoa and salt. Add powdered sugar and milk, beating to spreading consistency. Add small amount additional milk, if needed. Stir in vanilla. About 1 1/2 cups frosting.

Assembly:

Take cake layers out of freezer.
Place one layer on serving plate.
Top with half of filling.
Lay other layer on top.
Frost sides of cakes with chocolate frosting.
Spread rest of filling on top of cake.
Shred some chocolate on top of cake.

Waffle Cones/Cups


I have wanted a waffle cone maker for years, I don't know why. It's one of those specialty kitchen appliances that really doesn't get used much, but I love having those. It is fun to get them out on special occasions and sometimes just for fun. Dave listened to me and I got one for my birthday! We have used it twice since and are still figuring out the tricks, but we found a recipe we like A LOT! This is a thick batter; other recipes are more like a crepe batter but not as yummy. I prefer waffle bowls myself but we have struggled with make them look just right. I guess we'll just have to keep practicing....no one seems to be complaining about all the taste testing!

1 c. heavy cream
1 1/2 tsp. vanilla extract
1 1/2 c. powdered sugar
1 1/2 c. flour
1 TBS. cornstarch

In a bowl with a whisk, whip the cream with the vanilla until mousse-like (it won't form peaks).

Sift the remaining ingredients together and stir them into the cream to make a batter.

Let the batter sit for 30 minutes.

Heat up the waffle cone iron. I used heat setting 2.5.

Gluten Free Dairy Free Waffle Cones

1 whole large organic egg
1 egg white from an organic egg
1/4 ts kosher or sea salt
1/2 cup granulated white sugar
2/3 cup white rice flour
2 tb coconut oil, melted
1 ts pure vanilla

Heat waffle cone press to about darkness level 3-4.
In a medium mixing bowl, whisk together whole organic egg, plus egg white with salt. Blend well with fork. Next add sugar, blend until sugar dissolves, add coconut oil, white rice flour and vanilla and combine.
When your light comes on and the machine is hot, spoon 2 full TB of batter into the center of the waffle plate. Press down lid and let cook 60 seconds, check for doneness, if more time is needed, go another 30- 60 seconds (depending on how brown you want the cone to be).
When waffle cookie is ready, lift off the press with a spatula gently, and place on a clean flat towel, using the cone shaper tool roll the cookie, making sure to pinch the bottom.

White Chocolate Key Lime Cheesecake


A good friend made this years ago for a little lunch get together. I've had the recipe since then and have wanted to try it. I finally did!! Okay, so there are a few steps involved, but really it was simple and just as good as I remember it. My husband couldn't stop thinking about it and wanted even more to cut himself another slice.
I have begun to notice that most recipes call for WAY too much sugar, so I have been experimenting with less sugar and so far everything has turned out and tasted just fine. I will include what I did to lessen the sugar in this recipe.


Crust:
2 c. Nilla wafers or graham crackers, crushed
2 TBS. sugar (I omitted, the crackers already have enough sugar)
5 TBS. butter, melted

Combined all ingredients and press into a 9" springform pan. I then put in the freezer while I was making the filling.

Filling:
6 TBS. key lime juice (Nellie & Joe's recommended) 1 env. gelatin
2 1/2 c. whipping cream
9 oz. white baker's chocolate, chopped
3- 8 oz. pkg. cream cheese
1 c. sugar (I only used 1/2 c.)
1/2 TBS. lime zest

Place lime juice in a small bowl with gelatin and let stand.

Simmer 1/2 c. whipping until warm enough to melt chocolate. Combine until chocolate is completely melted. Add to gelatin mixture and allow to cool.

In a large mixing bowl beat cream cheese, sugar, and lime zest until light and smooth. Gradually add cooled chocolate mixture.

Whip remaining 2 c. whipping cream to stiff peaks and fold into cream cheese mixture. Pour into springform pan and let chill at least 4 hours.

Chocolate Raspberry Torte


I found this recipe looking through a ward cookbook. I am not normally a fan of fruit and chocolate together (I especially don't like orange and chocolate), but for some reason this sounded really good. Maybe it's the pregnant hormones :-)! Turns out, it IS really good! I think it is a great combination and it's not too rich. As you can see in the pictures, I had some issues with the glaze. I figured it would kind of drizzle down the sides of the cake, but it didn't. It ended up just plopping down on the plate. Next time I think I will just keep it on the top! Who cares what it looks like, it tastes great and was really simple to put together!


2 c. sugar
1 3/4 c. flour
3/4 c. cocoa powder
1 1/2 tsp. baking powder
1 1/2 tsp. baking soda
1 tsp. salt
2 eggs
1 c. milk
1/2 c. vegetable oil
2 tsp. vanilla
1 c. boiling water

Heat oven to 350. Spray three 9" round pans with cooking spray. In a large mixing bowl stir together dry ingredients. Add eggs, milk, oil and vanilla. Beat on medium speed. Slowly stir in boiling water (batter will be thin). Divide batter among prepared pans. Bake 20-25 minutes or until toothpick comes out clean. Cool 10 minutes, remove to wire racks, cool. Layer with raspberry filling.

Raspberry Filling:
1 12 oz. bag frozen raspberries
1 c. whipping cream
2 TBS. sugar

Whip cream with sugar until stiff. Mix in raspberries. Layer cake and filling - cake being last layer. Glaze.

Chocolate Glaze:
1/4 c. butter
1/4 c. cocoa
1/4 c. water
2 c. powdered sugar
1 tsp. vanilla

In a small saucepan over low heat melt butter, add cocoa and water stirring constantly until slightly thickened. Remove from heat, add powdered sugar and vanilla beating with a wire whisk until smooth. Add 1/2 tsp. water if needed. Spread glaze over top of torte. Refrigerate until ready to serve and any leftovers.

Chocolate Truffle Pops


I saw Giada make these on the Food Network and thought they were adorable. I really wanted to try them, because they seemed easy enough and make quite a statement. Okay, so they weren't as easy as originally thought but I did figure out my own tips and tricks (see below). They are still so fun and creative; oh, and quite tasty. Who doesn't want to eat chocolate off of a stick?


8 ounces (1 1/2 cups) bittersweet chocolate chips (I used 1 c. Ghiradelli Extra Dark chocolate chips and 1/2 c. semi-sweet chocolate chips)
3/4 cup heavy cream
1/2 teaspoon ground cinnamon (I omitted this, but did add 1/2 tsp. vanilla extract)
2 cups (12 ounces) bittersweet chocolate chips (I used half semi-sweet chips and half dark chocolate chips)

TOPPINGS (about 1 cup of 3 different types):
mini-chocolate chips
chopped nuts
SKOR bar, crushed
Butterfinger bar, crushed
graham cracker crumbs
toasted coconut

For the ganache: Line a baking sheet with parchment paper. In a medium stainless steel or glass bowl, combine the chocolate chips and heavy cream. Set the bowl over a saucepan of barely simmering water and stir occasionally until the chocolate has melted and the mixture is smooth, about 6 minutes. Whisk in the cinnamon. Refrigerate the ganache until very firm, about 2 hours. Using a 1-ounce cookie scoop or a round tablespoon measure, scoop the ganache into 18 (1-inch) round pieces and arrange on the prepared baking sheet. (I found that I had to let this mixture sit out at room temperature for over an hour to be able to work with it). Working quickly, with dry hands, roll the mixture into balls. Put a pop stick into each ball and freeze, stick side up, until firm, about 30 minutes.

Add the 2 cups of chocolate chips to a medium stainless steel or glass bowl. Set the bowl over a saucepan of barely simmering water and stir occasionally until the chocolate has melted, about 4 minutes.

Put the toppings 3 small bowls. Dip the pops in the melted chocolate, allowing the excess chocolate to drip off, and then dip into the toppings until coated. Arrange the pops, stick side up, on the baking sheet. Refrigerate for 30 minutes until the chocolate has set. Let the pops stand at room temperature for 15 minutes before serving.

Store the pops, refrigerated, in an airtight container.

Gooey Caramel Popcorn


I came across this recipe and since I am such a huge fan of caramel popcorn, I decided it was worth a try. It sounded so easy. My biggest concern was whether it would be gooey and chewy --- I don't like the crunchy caramel corn. Oh boy was it gooey!! And it stayed gooey for days (I had forgotten about it and found some several days later that was still just as gooey). This recipe is so much easier than other caramel corn so I think it will become our favorite!!

1 bag microwave popcorn (or 1/3 c. unpopped corn, popped)
1/2 cup butter
1/2 cup brown sugar
8-10 big marshmallows

Pop the popcorn and remove all of the obnoxious unpopped kernals. Microwave the butter, sugar, and marshmallows until melted (I started with 1 minute and found it wasn't completely melted, so probably did 20-30 more seconds). Stir to make a caramel goo. Pour the goo over the popcorn and stir to coat the popcorn.

Try to not eat it all in one sitting!!